Roblox Blender Sword: Import and Equip It
Build a low-poly sword from three cubes in Blender, import it through FBX, and equip it as an OriginalSword Tool with the grip in the right place.
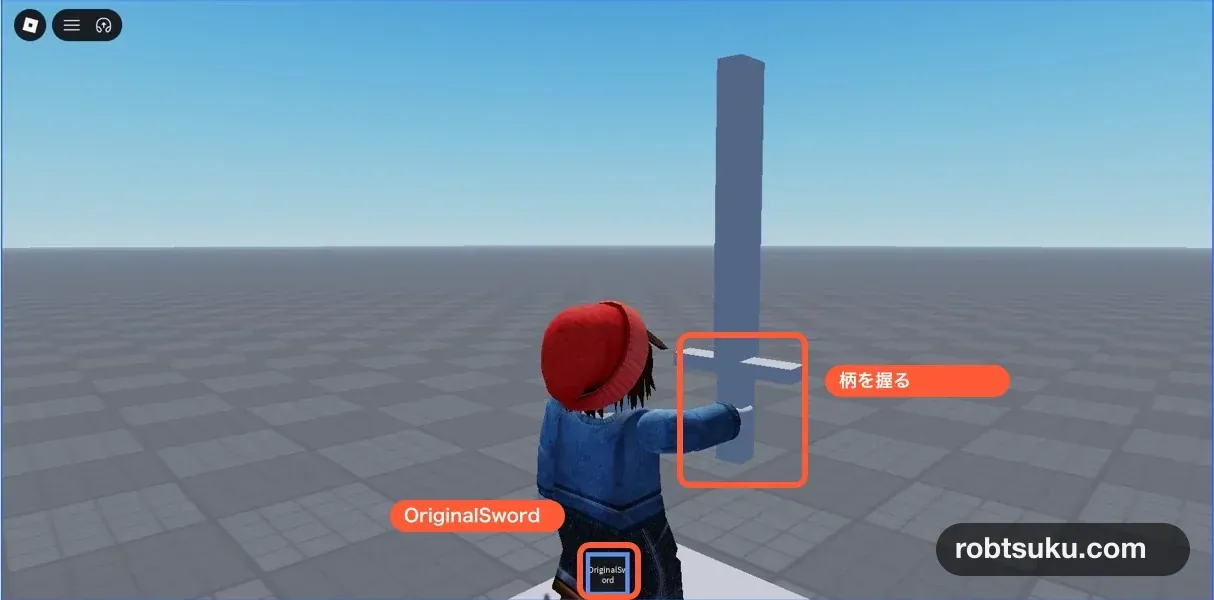
Build a blade, guard, and grip in Blender, then turn them into an OriginalSword that you can select from the hotbar. Allow about 12 minutes. You do not need Robux, an external plugin, or a published game.
Start with the working StarterPack > LightStick > Handle from Make a Tool You Can Hold in Roblox Studio. The first step covers Blender installation, so previous Blender experience is not required.
1. Install Blender, set the units, and save
Blender is a free application for making 3D shapes outside Roblox Studio. It runs on Windows, Mac, and Linux. If it is not installed, use the download link in Roblox’s official Blender guide. Start a new General file. This workflow does not use a Roblox account connection or a Blender add-on.
In Blender, select Scene Properties on the right and expand Units. Set:
| Setting | Value |
|---|---|
Unit System |
None |
Rotation |
Degrees |
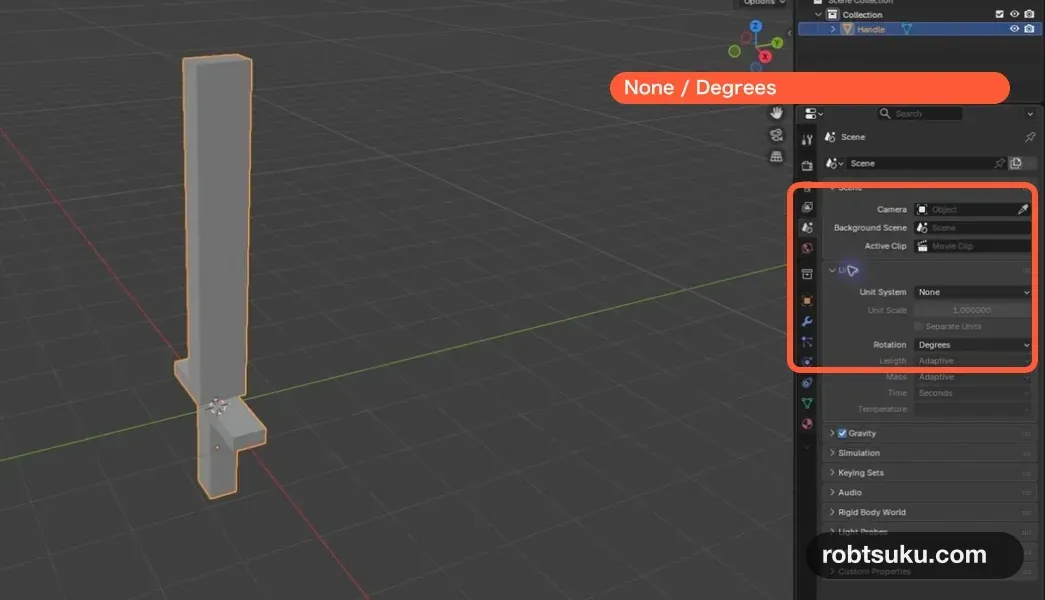
Roblox’s Blender unit configuration recommends these settings for matching Blender dimensions to Studio studs.
Save the editable blend file first
Open File > Save As. Enter original-sword.blend in the file-name field at the bottom, then select Save Blender File at the lower right. The button reads Overwrite when a file with that name already exists.
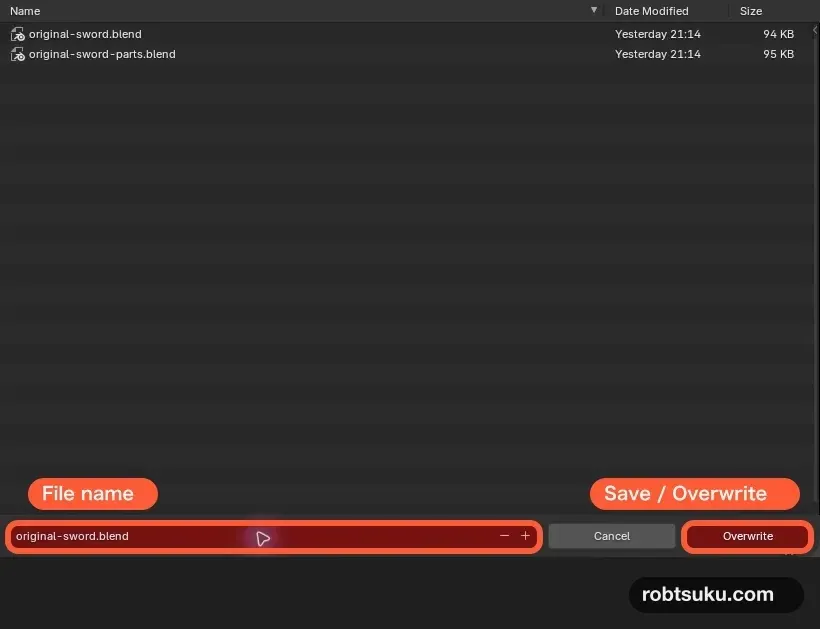
Keep the .blend file and the FBX you will export in the same folder. The .blend file is your editable source; the FBX is the file Studio reads.
Use File > Save while you work. The shortcut is Ctrl+S on Windows and Command+S on Mac. A successful save removes the * before the file name in Blender’s window title.
Tip — Learn three Blender areas
The central 3D Viewport shows the shape, the Outliner at the upper right lists objects, and Properties at the lower right holds settings. An object is one selectable item in Blender; the default Cube is one object.
2. Shape three cubes into a sword
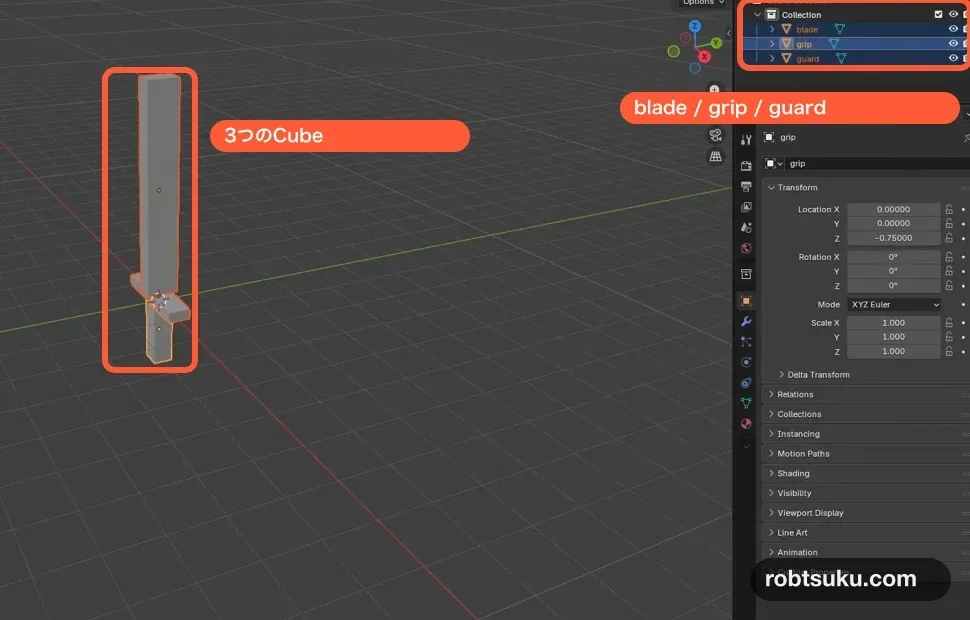
Confirm that the mode selector at the top says Object Mode. Select the default Cube and rename it blade in the Outliner. Press N to open Item > Transform, then enter the first row below.
Add two more cubes with Shift+A > Mesh > Cube. Rename them guard and grip, then enter their values.
| Object | Location X / Y / Z | Scale X / Y / Z |
|---|---|---|
blade |
0 / 0 / 2.65 |
0.22 / 0.36 / 2.4 |
guard |
0 / 0 / 0.12 |
1.1 / 0.25 / 0.12 |
grip |
0 / 0 / -0.75 |
0.24 / 0.22 / 0.75 |
Tip — G, R, and S transform an object
Select an object and press
Gto move,Rto rotate, orSto scale. Follow with an axis and a number for an exact change:G,Z,1,Entermoves up by 1;S,X,2,Enterdoubles the X size. PressEscto cancel orCtrl+Zto undo. The table keeps Rotation at0 / 0 / 0.
Tip — Moving the view does not move the object
Middle-drag rotates the view, Shift+middle-drag pans, and the mouse wheel zooms. You can also drag the XYZ gizmo at the upper right. These view controls do not change an object’s Location or Rotation.
The blade is the long cutting section, the guard crosses above the hand, and the grip is the section the avatar holds.
Tip — X, Y, and Z are the three directions
X is left and right, Y is depth, and Z is height.
Scale Z = 2.4makes the blade long, whileScale X = 1.1widens the guard.
Press A to select all three objects. Press Ctrl+A and choose Scale. Their displayed Scale values should become 1.000 without changing the visible sword.
3. Join the pieces into one Handle mesh
Click empty space to clear the selection. Select blade and guard while holding Shift, then select grip last. The grip should have the brighter orange outline.
Press Ctrl+J to join the three objects. Rename the result Handle with a capital H. The Outliner should contain one Handle, and its Scale should be 1 / 1 / 1. Use File > Save to save the .blend file again.
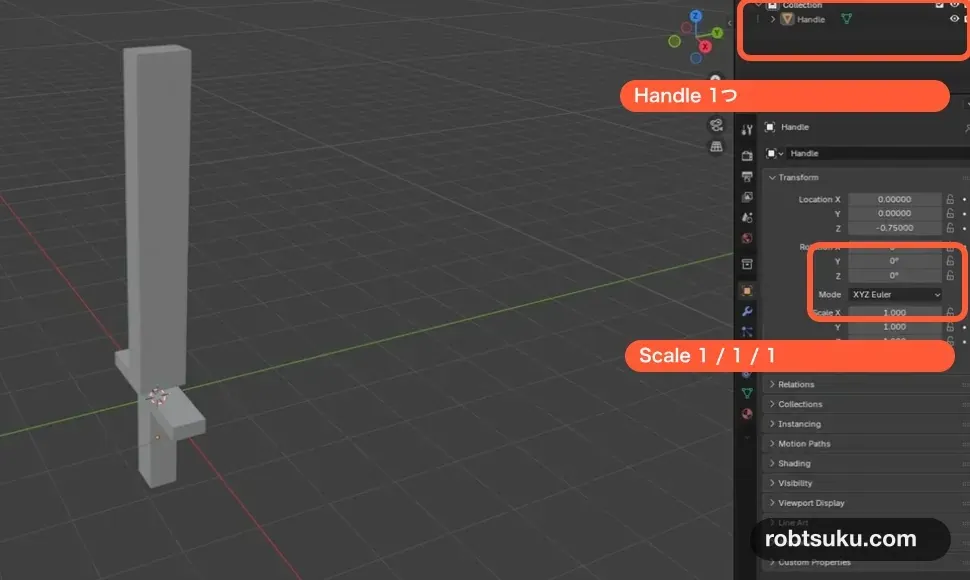
Tip — A mesh stores the 3D shape
A mesh combines vertices, edges, and faces into a surface. Joining the three cubes makes the complete sword one mesh that Studio can use as a Tool Handle.
Tip — The active object supplies the join result
The last selected object is the active object. Selecting
griplast lets the joined object inherit its origin and name, but this does not guarantee that an avatar’s hand lands on the grip. You will check and correct that relationship with the Tool’sGripproperty in Studio.
Roblox’s mesh geometry specification allows up to 20,000 triangles per mesh. This sword has 36 triangles. Because it is built from solid cubes, it also has thickness instead of exposed one-sided surfaces.
4. Export only the sword as FBX
Select Handle, then open File > Export > FBX (.fbx). Name the file original-sword.fbx and use these settings:
| Section | Setting | Value |
|---|---|---|
Include |
Selected Objects |
On |
Transform |
Scale |
1.00 |
Transform |
Apply Scalings |
FBX Units Scale |
Transform |
Forward |
Z Forward |
Transform |
Up |
Y Up |
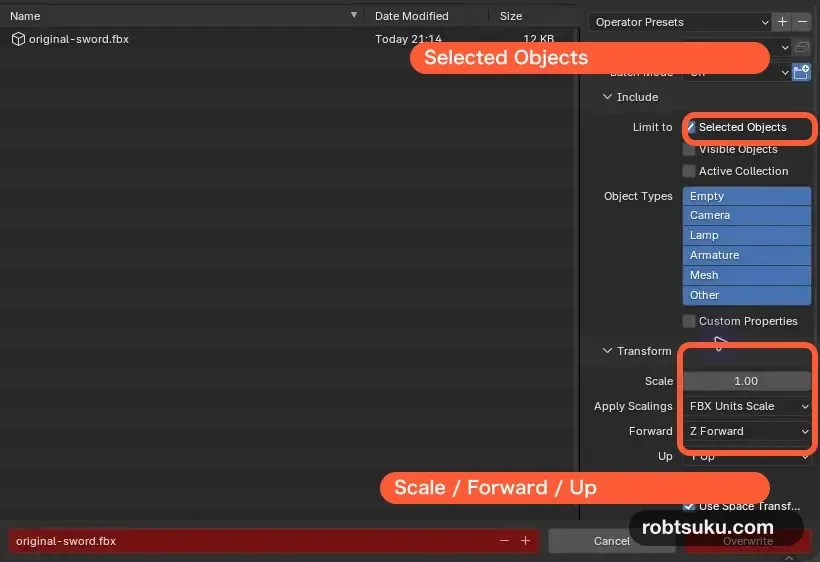
Turn Bake Animation off because this mesh has no animation. Roblox’s Blender FBX export requirements use FBX Unit Scale and allow Bake Animation to be disabled when no animation data is needed. Select Export FBX.
Tip — FBX carries the shape into Studio
Keep
original-sword.blendas the editable file.original-sword.fbxis the transfer file that Studio imports. When you revise the shape later, edit the.blendfile and export the FBX again.
5. Import Handle into Studio
Return to Roblox Studio and Stop any playtest. Choose File > Import, then select original-sword.fbx.
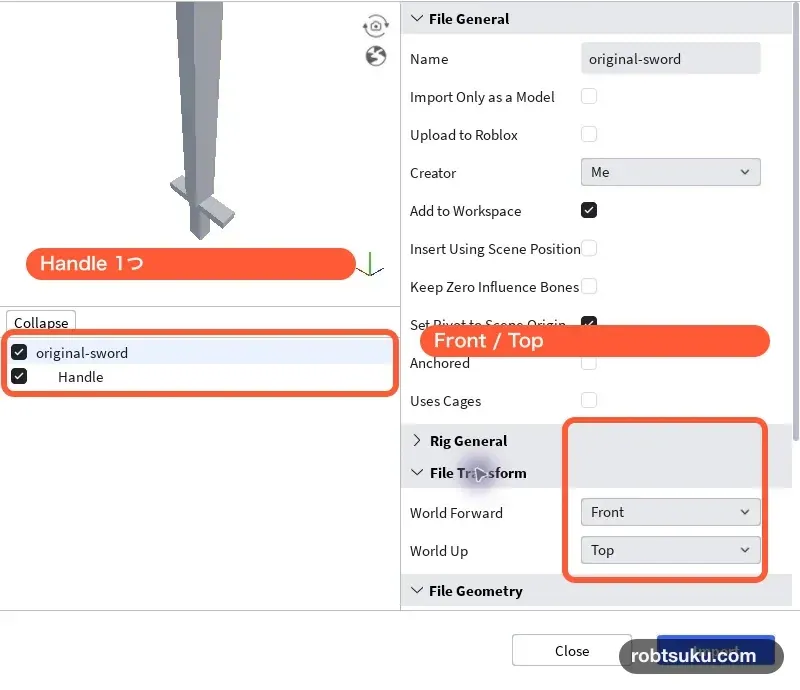
In Import Preview, the object list should contain one Handle and no warning or error. Under File General, turn on Import Only as a Model, Upload to Roblox, and Add to Workspace, and leave Anchored off. Uploading the mesh creates a private asset for your account; it does not publish the sword to Creator Store or Marketplace and does not spend Robux.
Under File Transform, check World Forward = Front and World Up = Top.
Under File Geometry, check Scale Unit = Stud and Scale Factor = 1.
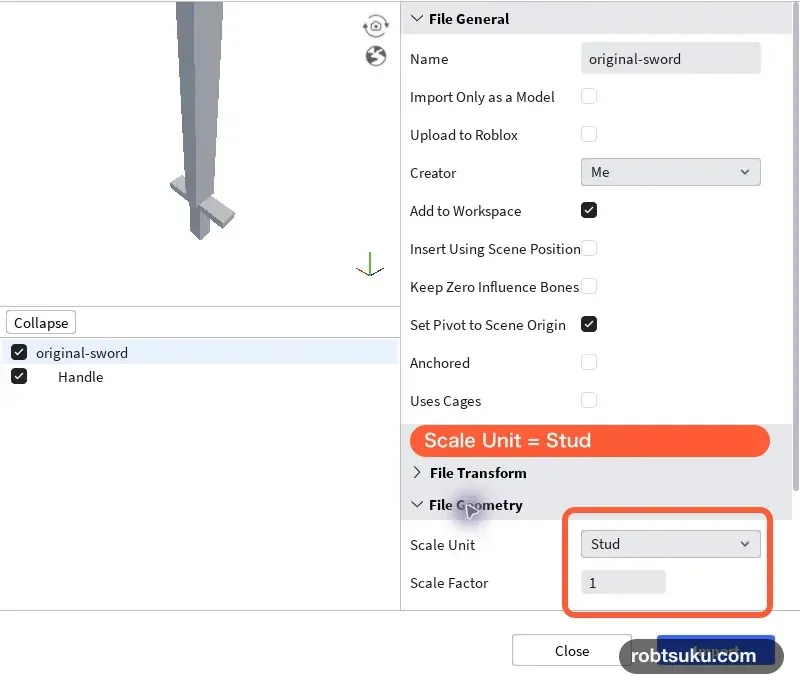
Roblox’s Blender-to-Studio settings use this Front, Top, and Stud combination. If the preview points in the expected direction, select Import.
Wait for Import Preview to close and Workspace > original-sword > Handle to appear. Select Handle once. The complete blade, guard, and grip should share one selection box. If each section selects separately, return to Blender, join all three with Ctrl+J, and export again.
Tip — MeshPart displays a custom mesh
A
MeshPartdisplays a shape that was made outside Studio. The imported sword is one MeshPart namedHandle, so the Tool system can attach it to a hand.
6. Replace LightStick with the sword
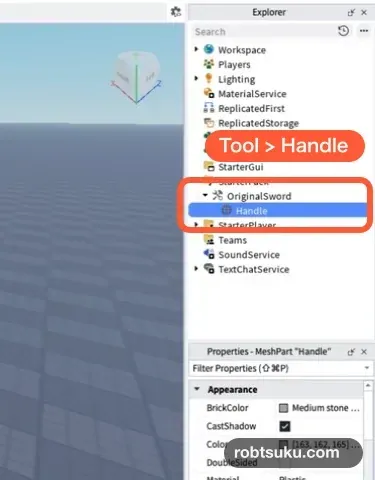
Rename StarterPack > LightStick to OriginalSword, then delete its old Part named Handle. Drag Workspace > original-sword > Handle directly under OriginalSword. Delete the empty original-sword Model.
StarterPack
└─ OriginalSword (Tool)
   └─ Handle (MeshPart)
Select the MeshPart Handle and turn Anchored and CanCollide off. Confirm that no second Handle remains in Workspace. Roblox’s Tool handle guide explains that a one-part physical Tool attaches the MeshPart named Handle.
Expand the Tool in Explorer. Handle must appear one indentation level below OriginalSword, not beside it.
Select the parent Tool OriginalSword, search Properties for Grip, and set:
| Grip | Value |
|---|---|
Position |
0, -2.5, 0 |
Orientation |
0, 0, 0 |
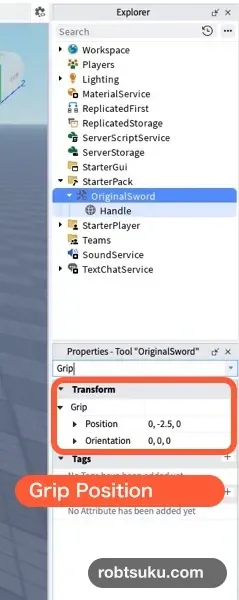
Roblox’s Tool grip documentation describes Grip as the position and orientation of the held object relative to the hand. For this sword, Y -2.5 moves the hand from the blade area to the grip below the guard.
Tip — Grip changes placement, not the mesh
With the dimensions in this guide,
0, -2.5, 0places the grip inside the right hand. If you change the grip length, adjust only Y in steps of0.1while viewing the equipped sword from the side. The guard should remain above the hand, the grip should cross the palm, and the blade must not pass through the hand.
7. Check fit, unequip, and re-equip
Press Play and select OriginalSword from the hotbar. View the avatar from a close side or three-quarter angle. The tested R15 avatar should hold the rectangular grip in its right hand, below the guard, with the blade pointing upward. The blade and guard must not intersect the hand.

This fit was verified only with the blog account’s current R15 avatar. R6 and different body proportions are outside this article’s tested claim. If you support another avatar shape, repeat the same close contact and intersection check for that configuration.
Select the same hotbar slot again to unequip, then select it once more to re-equip. If other Tools are present, the sword may not use number key 1; choose the slot named OriginalSword.
Check these three results:
- The hotbar contains
OriginalSword. - Equipping places the right hand on the grip below the guard, and the avatar can still walk.
- Unequipping and re-equipping restores the same position and orientation.
Stop and Play again. The sword should return to the hotbar from StarterPack. Do not edit the temporary Tool copy that appears under the character or Backpack during Play; Stop first and edit StarterPack > OriginalSword.
Clicking with the sword does nothing yet. This guide covers the model and fit only, not attacks, damage, or animation.
Troubleshooting
- Importer lists several objects: Join
blade,guard, andgripwithCtrl+Jand leave one Outliner object namedHandle. - The file picker does not show your sword: Select
original-sword.fbx, not the.blendsource. - The sword is too large: Check
FBX Units Scale,Scale Unit = Stud, andScale Factor = 1. - The sword points sideways: Restore
Z Forward,Y Up,Front, andTop. - The hotbar has no sword: Put one
Handledirectly underStarterPack > OriginalSword. - Equipping prevents movement: Turn
Handle.Anchoredoff and start a new Play session. - The hand touches the blade or guard: Set
Grip.Positionto0, -2.5, 0; after custom size changes, adjust only Y by0.1while checking a close side view.
Completion check
You now have one 36-triangle Handle mesh, one OriginalSword > Handle Tool, and a verified R15 grip position. The sword equips, unequips, and re-equips without the blade or guard crossing the hand.
The next project adds a single sword-swing animation without damage.
Official sources
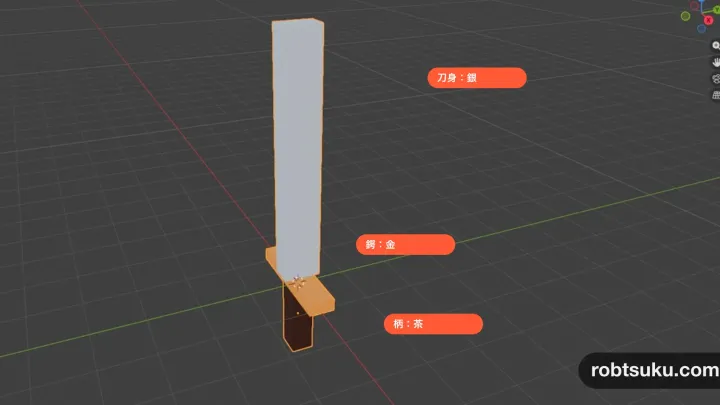
Roblox Blender Sword: UV Mapping and Textures
UV unwrap a sword, paint its blade silver, guard gold, and grip brown, then import the textured Handle into Roblox Studio.
Build this feature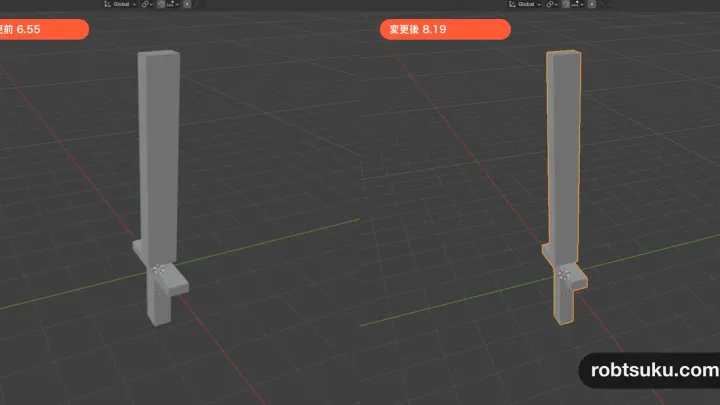
Update a Blender Model in Roblox with Reimport
Make a Blender sword longer, export over the same FBX, and update its existing Handle without rebuilding the OriginalSword Tool.
Build this feature