Finish and Test Your First Roblox Obby
Add a GOAL sign to the yellow platform with SurfaceGui and TextLabel, then test your complete three-stage obby from start to finish.
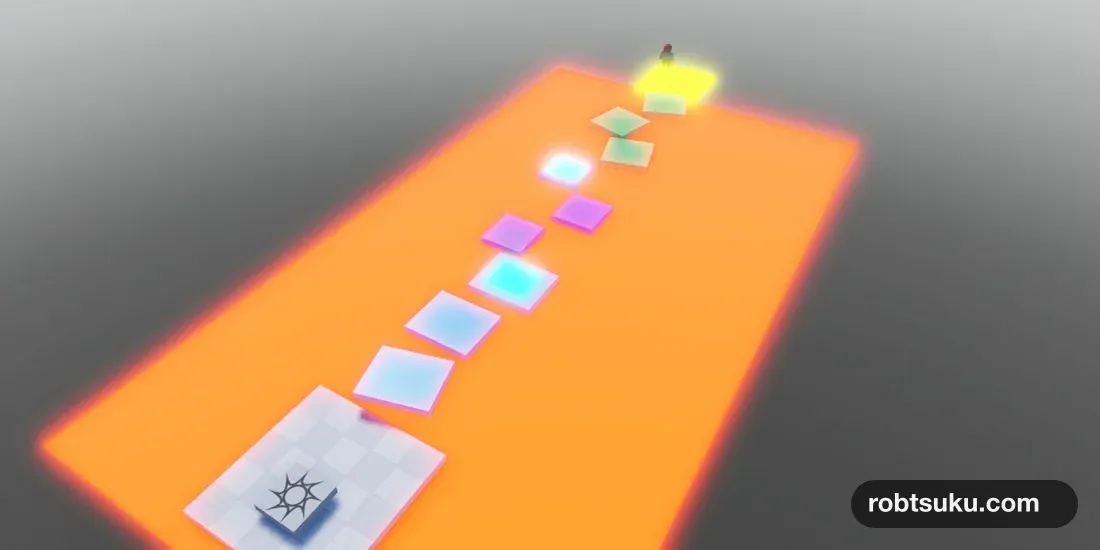
The previous lesson left you with working platforms, lava, and two checkpoints. Turn the temporary yellow platform into a clear finish marked GOAL. Then test the whole course as one connected playthrough instead of checking only the newest part.
This lesson does not add another Script. It displays text on a Part with SurfaceGui and TextLabel.
Turn the temporary finish into a goal platform
Open Course in Explorer, select TemporaryGoal, and rename it GoalPlatform. Check these Properties:
- Size:
12, 1, 12 - Position:
0, 7, -99 - Anchored: on
- Material:
Neon - Color: yellow
If you used the values from the earlier lessons, the platform’s size and position need little or no adjustment. Its yellow surface beyond the green Stage 3 already suggests a finish. If it falls during a playtest, turn Anchored back on.
Color also guides the route. Cyan marks a restart point, orange marks a dangerous surface, and yellow marks the final destination. Reusing a color for one role and separating different roles helps a player choose a direction without reading an explanation.
Add a SurfaceGui to the top face
Hover over GoalPlatform in Explorer and select the + button. If it is hidden, right-click the Part and select Insert Object. Search for SurfaceGui and add it.
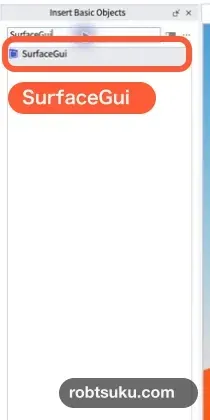
Rename the new SurfaceGui to GoalSign, then set:
- Face:
Top - SizingMode:
PixelsPerStud - PixelsPerStud:
40 - LightInfluence:
0
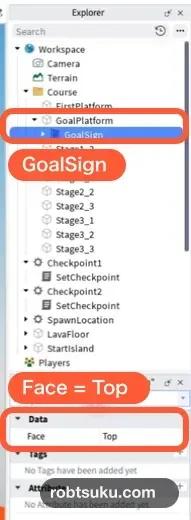
A UI displays text or information to the player. SurfaceGui is a container that places UI on one face of a Part. The Face property in the official SurfaceGui reference chooses which face receives the display. Players approach this platform from above, so use Top.
Tip: What is a pixel?
A pixel is one small dot used to draw text and images on a screen. More pixels make diagonal and curved edges look smoother.
PixelsPerStudset to40uses 40 pixels for each stud. A platform 12 studs wide therefore gives the wordGOALabout 480 pixels of horizontal space.
PixelsPerStud controls the display resolution on the Part. A value of 40 keeps the large letters smooth enough for this platform. LightInfluence 0 prevents the world lighting from making the UI difficult to read.
Expand the arrow beside GoalPlatform in Explorer and confirm that GoalSign is inside it. A SurfaceGui placed directly under Workspace or Course does not know which Part surface to use. Keeping it beneath GoalPlatform also moves the display with the platform.
Display GOAL with a TextLabel
Select the + button on GoalSign, search for TextLabel, and add it.
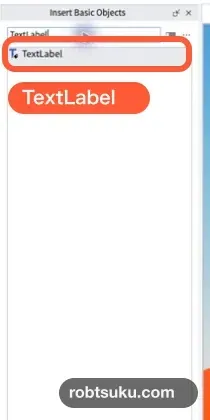
Rename the new object GoalText and set these Properties:
- Size:
{1, 0}, {1, 0} - BackgroundTransparency:
1 - Text:
GOAL - TextScaled: on
- Font:
GothamBlack - TextColor3: a dark navy color
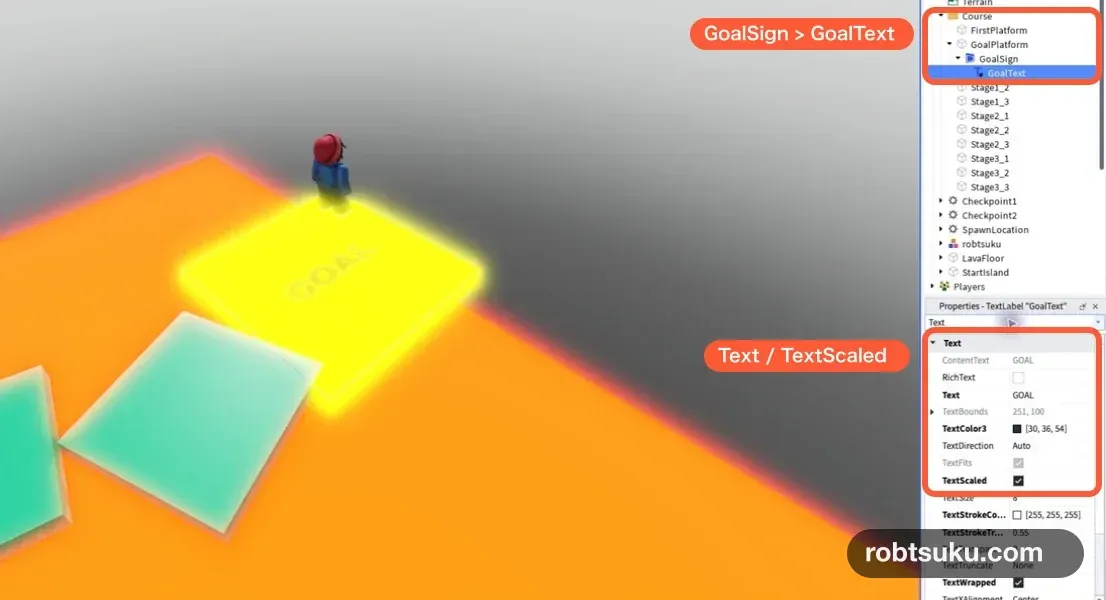
As Roblox’s UI labels documentation explains, TextLabel is the object that draws the text. A full-size label uses all of GoalSign. BackgroundTransparency 1 removes the rectangle behind the word so the yellow surface remains visible. TextScaled adjusts the letters to fit the available area.
The Size value {1, 0}, {1, 0} means 100% of the parent’s width and height with no extra pixels. In the expanded Size controls, set both X and Y Scale to 1 and both Offset values to 0.
The finished Explorer hierarchy is GoalPlatform > GoalSign > GoalText: the yellow Part, its surface display, and the text inside that display. GoalText will not render if it sits directly beneath GoalPlatform, so expand each arrow and check all three levels.
If the text is sideways or reversed, check that GoalSign Face is Top. If it is too small, inspect GoalText Size and TextScaled. Use a dark text color rather than another yellow shade so the letters remain readable.
Test the complete course
A focused test checks only the feature you just built. An end-to-end test follows the whole game from beginning to end. Press Play and complete this sequence:
- Start at the SpawnLocation on StartIsland.
- Cross the blue Stage 1 and touch Checkpoint1.
- Cross the purple Stage 2 and touch Checkpoint2.
- Fall onto LavaFloor once and return to Checkpoint2.
- Cross the green Stage 3 and stand on the yellow GoalPlatform.

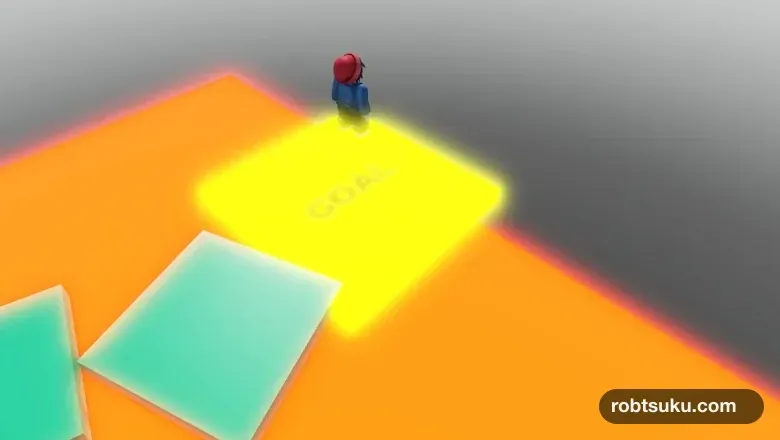
The deliberate fall checks that the older checkpoint feature still works after the new goal was added. A run that only follows the successful route could hide a broken restart path. Play in Studio testing modes starts the character near a SpawnLocation and lets you exercise this complete flow.
Check readability as well as mechanics. From StartIsland, the first blue platform should be visible. Each stage finish should reveal the next color, and the yellow GOAL should be readable from the green platforms. If finding the route requires a large camera turn, adjust the direction or position of the obstructing platform after the test.
When the character reaches GoalPlatform, wait about two seconds before pressing Stop. The character should remain on the platform while the yellow surface and GOAL text are both visible. This lesson does not add a victory screen or timer, so standing on that clear finish is the observable end of the game.
If one jump is consistently difficult, adjust only that part after pressing Stop. Check the distance to the next platform, the height difference, and whether the next target is visible from the approach. Changes made to Parts during a playtest are discarded when the test stops, so make permanent adjustments in edit mode and repeat the full run.
Save the finished place to your computer
After the end-to-end test, press Stop, then select File > Save to File in the upper-left corner of Studio. Choose a location you can find later and save the file as my-first-obby.rbxl.
An .rbxl file stores the entire place, including its Parts and Scripts, on your computer. Roblox’s Place files documentation also describes Save to File as the way to keep a local copy. Open that file later to continue from the same place.
Save it again whenever you change a platform or Script before ending a work session.
If it does not work
Check these items in order:
GoalSignis a child ofGoalPlatform.GoalTextis a child ofGoalSign.- GoalSign Face is
Top. - GoalText Text is the uppercase word
GOAL. - BackgroundTransparency is
1and TextScaled is on. - Open Output from Window and confirm that the existing Scripts show no new red errors.
First obby completion check
- The character begins on StartIsland.
- LavaFloor defeats the character.
- The character returns to the last cyan checkpoint touched.
- The yellow GOAL is visible beyond the green Stage 3.
- The character can stand still on GoalPlatform.
- Output contains no new red errors.
- The complete place is saved as
my-first-obby.rbxl.
Your first three-stage obby is now a small, complete game rather than a collection of separate tests. The next lesson saves this finished place to Roblox as a Private experience that you can reopen later.
Previous: Add Checkpoints to a Roblox Obby
Next: Publish a Roblox Game as Private