Add Checkpoints to a Roblox Obby
Use two SpawnLocations and a short Luau Script so players restart from the last checkpoint they touched after falling into the lava.
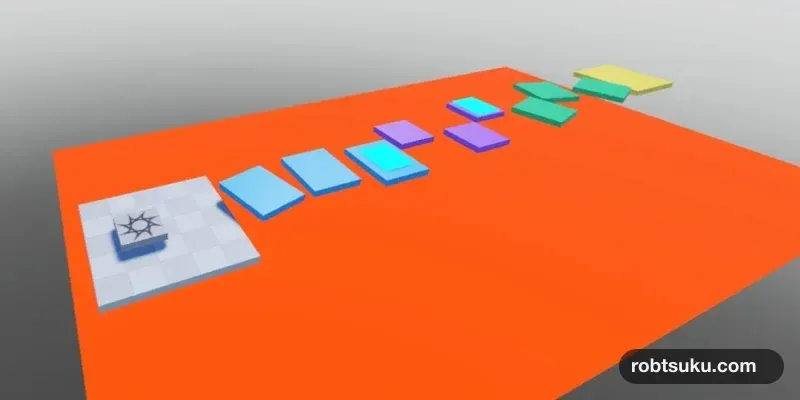
The previous lesson made the character fall apart on the lava and return to the beginning. Repeating a long course from the start after every mistake quickly becomes frustrating. Add cyan checkpoints at the end of Stage 1 and Stage 2 so the player restarts from the last one they touched.
Each checkpoint uses Roblox’s built-in SpawnLocation. A SpawnLocation is a place where a character can appear. A pair of Scripts will distinguish the initial spawn from the locations used after a fall.
Keep the first spawn at StartIsland
Adding more SpawnLocations can make a new player appear halfway through the course. Add a Script to the original SpawnLocation and rename it StartAtBeginning. Delete the starter code and paste this:
local Players = game:GetService("Players")
local startSpawn = script.Parent

local function setStart(player)
	player.RespawnLocation = startSpawn
end

Players.PlayerAdded:Connect(setStart)

for _, player in Players:GetPlayers() do
	if player.RespawnLocation == nil then
		setStart(player)
	end
end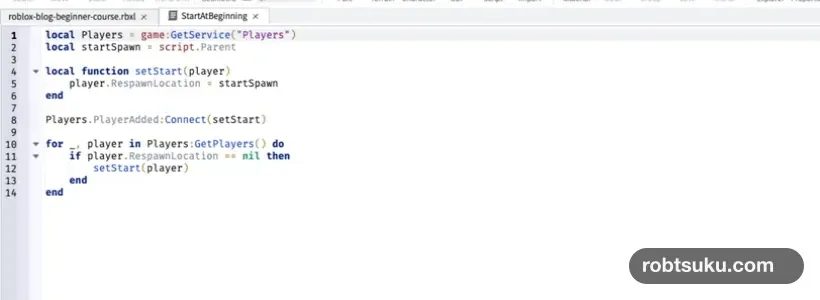
Tip: What is a Roblox service?
A service is a group of game-wide features and information provided by Roblox.
game:GetService("Players")retrieves thePlayersservice, which holds the current Player objects and signals when somebody joins. A two-player test, for example, gives this service two Player objects to manage.
PlayerAdded signals that a new participant has joined and passes that Player to setStart. The final for loop also checks players who already exist when the Script begins running, which can happen immediately after you press Play.
Read from the top, the first two lines assign short names to the objects the Script needs. Players is the participant list, and startSpawn is the original SpawnLocation that contains this Script. Calling setStart(player) sets that Player’s restart point to startSpawn. Both new and existing participants use the same function, so changing the initial location later requires only one edit.
The condition player.RespawnLocation == nil checks whether the Player has no restart point yet. A Player who already touched a checkpoint has a SpawnLocation stored here, so this check will not overwrite it with the beginning.
Tip: A Player and a character are different objects
A Player stores information for one participant. A character is the body that walks and falls in the 3D world. In a two-player game, each Player owns a separate character. Because
RespawnLocationbelongs to the Player, one person’s checkpoint does not replace another person’s checkpoint.
Build Checkpoint1
Select the original SpawnLocation in Explorer and duplicate it with Command + D on Mac or Ctrl + D on Windows. Rename the copy Checkpoint1, move it to the end of Stage 1, and set these Properties:
- Position:
3, 4.75, -35 - Size:
6, 0.5, 5 - Anchored: on
- Enabled: on
- Neutral: on
- Duration:
0 - Material:
Neon - Color: cyan
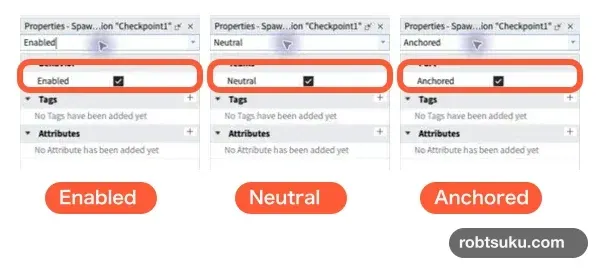
Enabled allows Roblox to use the object as a respawn point. Neutral allows any Player to use it without belonging to a Team. This course does not use Teams, but leaving the property on matches the original SpawnLocation. Duration 0 removes the protective force field that normally appears after spawning.
The cyan Neon surface makes the restart point easy to notice. Color does not activate the Script. Raise the thin surface slightly above the surrounding platform so the character’s feet reliably touch it. If the edge catches the character during a playtest, keep its Y position and restore the thickness to 0.5.
Change the restart point on contact
Add a Script beneath Checkpoint1, rename it SetCheckpoint, and paste this code:
local Players = game:GetService("Players")
local checkpoint = script.Parent

local function setCheckpoint(otherPart)
	local character = otherPart.Parent
	local player = Players:GetPlayerFromCharacter(character)
	if player then
		player.RespawnLocation = checkpoint
	end
end

checkpoint.Touched:Connect(setCheckpoint)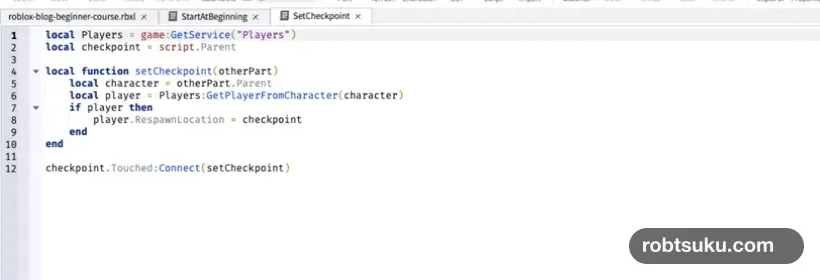
Touched, the function, and otherPart work like they did in the lava lesson. This time, the Script finds the Player who controls the body instead of reducing the body’s health.
otherPart.Parent moves from the body Part that touched the checkpoint to the full character. Players.GetPlayerFromCharacter() finds the Player controlling that character. If an unrelated Part touches the surface, no Player is found and the result is nil. The if player then block only continues when a Player exists.
player.RespawnLocation = checkpoint stores the new restart point. Player.RespawnLocation accepts an enabled SpawnLocation in Workspace.
A character contains several body Parts, so Touched may run more than once while the character stands on the surface. Reassigning the same Checkpoint1 value is safe for this lesson; no delay or contact counter is needed.
Duplicate Checkpoint2
Select Checkpoint1 in Explorer and duplicate it again. Its child Script is duplicated with it. Rename the copy Checkpoint2, set Position to -4, 5.75, -62, and place it at the end of Stage 2.
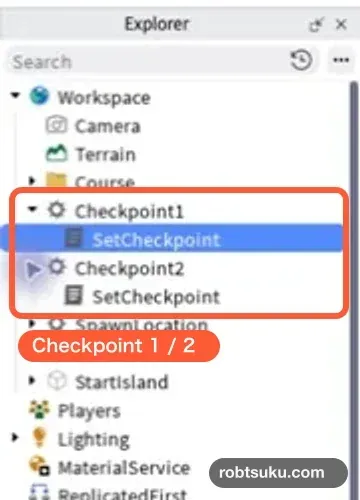
Both Checkpoint1 and Checkpoint2 should contain one SetCheckpoint Script.
Inside the copied Script, script.Parent now refers to Checkpoint2. The same code therefore stores Checkpoint1 when it runs beneath Checkpoint1 and Checkpoint2 when it runs beneath Checkpoint2. Renaming the second checkpoint does not require a code change as long as the parent-child structure remains intact.
Test both restart points
Press Play and follow this sequence:
- Walk onto the cyan surface at Checkpoint1.
- Walk off the course and land on LavaFloor.
- Confirm that the character returns to Checkpoint1.
- Reach Checkpoint2, fall again, and confirm that the character returns to Checkpoint2.

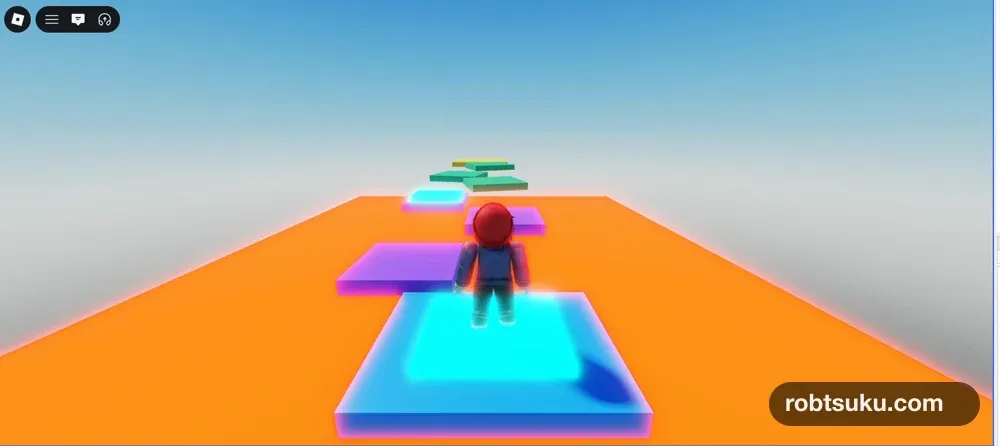
Falling before touching either cyan surface should return the character to the original SpawnLocation. Roblox Studio’s multi-client mode can also confirm that two Players keep separate checkpoints, but the four-step single-player test above is enough to complete this lesson.
Test three distinct states when diagnosing a problem: no checkpoint touched, only Checkpoint1 touched, and Checkpoint2 touched. Starting halfway through the course points to StartAtBeginning. A failure at only Checkpoint1 points to its SetCheckpoint. If both checkpoints return to the beginning, inspect their shared code and Enabled property. If only Checkpoint2 fails, confirm that the duplicate includes its Script and was moved to the second position.
If it does not work
Check these items in order:
- The original
SpawnLocationcontainsStartAtBeginning. - Enabled, Neutral, and Anchored are on for both checkpoints.
- Each checkpoint contains one
SetCheckpoint. - The capitalization of
GetPlayerFromCharacterandRespawnLocationmatches the example. - Open Output from Window and inspect the line number of any red error.
If the character stands on the cyan surface but still returns to the beginning, confirm that a foot actually touches the SpawnLocation. Restore Size to 6, 0.5, 5 if the surface is small enough to jump over.
Completion check
- A new Player starts at the SpawnLocation on StartIsland.
- After touching Checkpoint1, the Player restarts at Checkpoint1.
- After touching Checkpoint2, the Player restarts at Checkpoint2.
- Each checkpoint contains one
SetCheckpoint. - Ordinary platforms do not change the restart point.
The obby now lets a player retry from the latest completed stage. Next, you will replace the temporary yellow platform with a clear GOAL sign and test the complete course from beginning to end.
Previous: Make Deadly Lava in Roblox Studio with Luau
Next: Finish and Test Your First Roblox Obby