Build Server-Validated Melee Hit Detection in Roblox Studio
Let the server validate cooldown, range, facing, and line of sight, then deal 25 damage exactly once per sword swing.
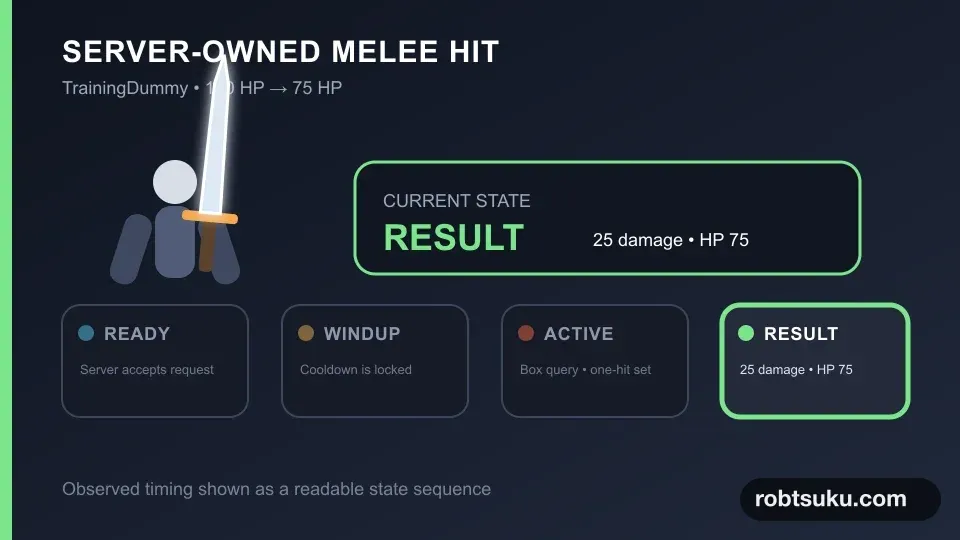
Extend the swing from project step 1 so it changes a TrainingDummy from 100 HP to 75 HP. The client will only request an attack. The server decides whether the request is allowed, which targets are valid, and how much damage they receive.
1. Build the test map and request channel
Start with a small map that can compare a valid hit and a blocked hit at the same distance. Add these four objects under Workspace. If the place already has a floor or spawn, rename it and match these values:
ArenaFloor—PartwithPosition = 0, 0, 0,Size = 82, 1, 56, andAnchored = true.CombatSpawn—SpawnLocationwithPosition = 0, 1.5, 14,Size = 7, 0.4, 7,Anchored = true, andNeutral = true.TrainingDummy > HumanoidRootPart—Position = 0, 3, 7andAnchored = true.TestWall—PartwithPosition = 0, 3.5, 10.5,Size = 5, 6, 1,Anchored = true,CanCollide = true, andCanQuery = true.
Add ArenaFloor and TestWall from Home > Part, then rename them in Explorer. Use the + beside Workspace to add CombatSpawn. A SpawnLocation determines where a character enters Play. Set the wall’s Material to Brick and give it a color that stands apart from the floor.
Tip — Position values use X, Y, Z order
Xmoves left and right,Ycontrols height, andZmoves forward and backward. This preset places the wall atZ = 10.5, halfway between the spawn atZ = 14and the dummy atZ = 7.
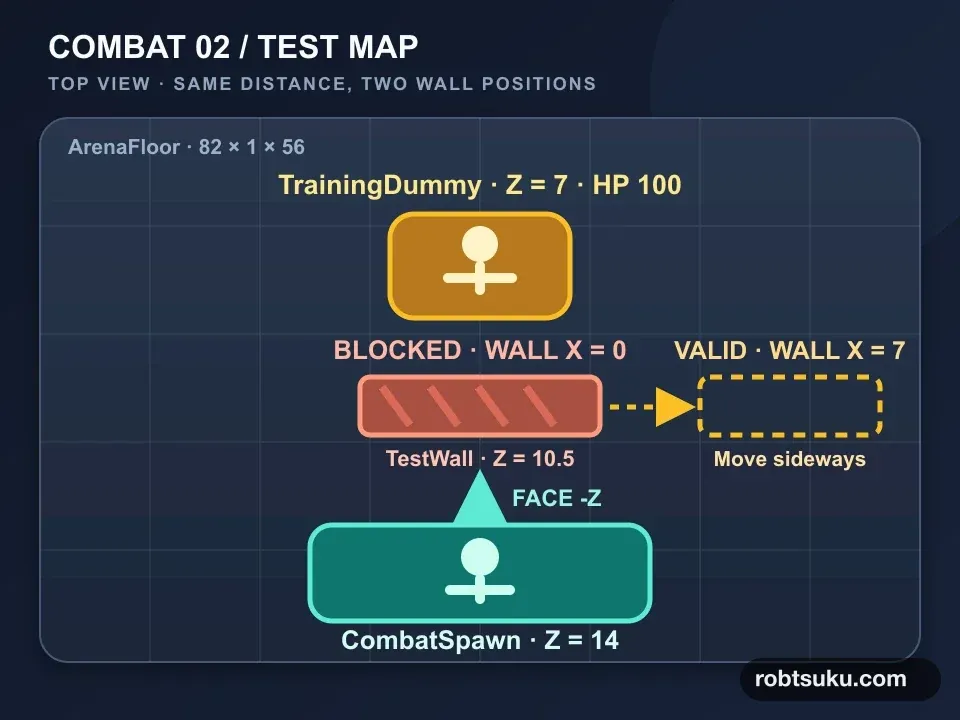
For the valid-hit test, change only the wall’s Position.X to 7. This parks it beside the attack line. For the blocked test, restore X = 0. Keep Z = 10.5 in both cases. At the start of Play, move to the center line and face the dummy so both tests use the same distance of about 7 studs.
Use Avatar > Character > Generate Rig to add an R15 block rig. Rename it TrainingDummy, set its Humanoid.MaxHealth and Humanoid.Health to 100, anchor its HumanoidRootPart, and place it in front of the spawn. This is the Character button described in Roblox’s official Rig Generator guide.
Add a RemoteEvent directly under ReplicatedStorage and name it SwordAttack.
Tip — Send a request, not a combat result
A modified client could lie about a target or damage number. This event sends no arguments. The server owns the fixed
25damage, the query size, and the0.95-second cooldown.
In SwordAnimationClient, get the event near the top and call it immediately after setting busy = true:
local attackEvent = game:GetService("ReplicatedStorage"):WaitForChild("SwordAttack")

-- Inside tool.Activated
attackEvent:FireServer()
2. Own attack timing on the server
Add a Script named SwordCombatServer to ServerScriptService. Use the following code:
local Players = game:GetService("Players")
local ReplicatedStorage = game:GetService("ReplicatedStorage")

local attackEvent = ReplicatedStorage:WaitForChild("SwordAttack")
local COOLDOWN = 0.95
local WINDUP = 0.28
local ACTIVE_DURATION = 0.12
local DAMAGE = 25
local HITBOX_SIZE = Vector3.new(6, 5, 7)
local MAX_DISTANCE = 8.5
local MIN_FACING_DOT = 0.2
local lastAttackAt = {}

local function hasLineOfSight(attacker, origin, target, targetPosition)
	local params = RaycastParams.new()
	params.FilterType = Enum.RaycastFilterType.Exclude
	params.FilterDescendantsInstances = {attacker}
	local hit = workspace:Raycast(origin, targetPosition - origin, params)
	return hit == nil or hit.Instance:IsDescendantOf(target)
end

local function findCandidates(character)
	local root = character:FindFirstChild("HumanoidRootPart")
	if not root then return {} end

	local params = OverlapParams.new()
	params.FilterType = Enum.RaycastFilterType.Exclude
	params.FilterDescendantsInstances = {character}
	local box = root.CFrame * CFrame.new(0, 1.5, -4)
	local parts = workspace:GetPartBoundsInBox(box, HITBOX_SIZE, params)
	local result, seen = {}, {}

	for _, part in parts do
		local model = part:FindFirstAncestorOfClass("Model")
		local humanoid = model and model:FindFirstChildOfClass("Humanoid")
		if humanoid and humanoid.Health > 0 and not seen[humanoid] then
			seen[humanoid] = true
			table.insert(result, humanoid)
		end
	end
	return result
end

local function isValidTarget(character, targetHumanoid)
	local root = character:FindFirstChild("HumanoidRootPart")
	local target = targetHumanoid.Parent
	local targetRoot = target and target:FindFirstChild("HumanoidRootPart")
	if not root or not targetRoot then return false end

	local offset = targetRoot.Position - root.Position
	if offset.Magnitude == 0 or offset.Magnitude > MAX_DISTANCE then
		return false
	end
	if root.CFrame.LookVector:Dot(offset.Unit) < MIN_FACING_DOT then
		return false
	end
	return hasLineOfSight(
		character,
		root.Position + Vector3.new(0, 1.8, 0),
		target,
		targetRoot.Position
	)
end

local function runAttack(player)
	local character = player.Character
	local humanoid = character and character:FindFirstChildOfClass("Humanoid")
	local tool = character and character:FindFirstChild("OriginalSword")
	if not character or not humanoid or humanoid.Health <= 0 or not tool then
		return
	end

	local now = os.clock()
	if now - (lastAttackAt[player] or -math.huge) < COOLDOWN then
		return
	end
	lastAttackAt[player] = now

	player:SetAttribute("CombatPhase", "WINDUP")
	task.wait(WINDUP)
	if player.Character ~= character or humanoid.Health <= 0 then return end

	player:SetAttribute("CombatPhase", "ACTIVE")
	local hitThisSwing = {}
	local startedAt = os.clock()
	repeat
		for _, targetHumanoid in findCandidates(character) do
			if not hitThisSwing[targetHumanoid]
				and isValidTarget(character, targetHumanoid) then
				hitThisSwing[targetHumanoid] = true
				targetHumanoid:TakeDamage(DAMAGE)
			end
		end
		task.wait()
	until os.clock() - startedAt >= ACTIVE_DURATION

	player:SetAttribute("CombatPhase", "RECOVERY")
	task.wait(math.max(0, COOLDOWN - WINDUP - ACTIVE_DURATION))
	if player.Parent then player:SetAttribute("CombatPhase", "READY") end
end

attackEvent.OnServerEvent:Connect(function(player)
	task.spawn(runAttack, player)
end)

Players.PlayerRemoving:Connect(function(player)
	lastAttackAt[player] = nil
end)
The event carries no client-controlled values, so there are no target or damage arguments to type-check. The server still validates request frequency, a living character, the equipped Tool, target health, range, facing, and line of sight.
Tip — A hitbox is the space checked during the active interval
GetPartBoundsInBox()queries a6 × 5 × 7-stud box placed in front of the character. It does not create a permanent invisible Part. The server repeats the query only during the0.12-second active window.
hitThisSwing is a fresh set for each accepted attack. A rig may put its arm, torso, and leg inside the box at the same time, but their shared Humanoid can enter this set only once.
Revalidate after the request arrives
Roblox supplies the player argument to OnServerEvent, so a client cannot impersonate another Player in that position. The Player can still reset, die, or unequip between the request and the hit. runAttack() checks the current Character, living Humanoid, and equipped OriginalSword before accepting the request. After the 0.28-second windup, it verifies that the same Character is still alive.
Cooldown time comes from the server’s os.clock(). The client never reports how long it has waited. Sending the event many times or changing a local clock cannot enter a second attack before the server-owned 0.95 seconds expire.
The CombatPhase attribute is also server-owned. It advances through WINDUP, ACTIVE, RECOVERY, and READY independently of the visual animation markers. A modified marker can change what that client sees, but it cannot expand the server’s 0.12-second active query.
Tip — Cooldown is the wait before another request can begin
This attack always occupies
0.95seconds. Recovery is the remainder after subtracting the0.28-second windup and0.12-second active window.

3. Reject invalid targets
Being inside the box is not enough. isValidTarget() also requires:
- no more than 8.5 studs between roots;
- a facing dot product of at least
0.2; - no wall hit before the target;
- living attacker and target;
OriginalSwordequipped by the attacker.
Tip — The dot product measures facing
LookVector:Dot(offset.Unit)is near1in front,0to the side, and-1behind. Rejecting values below0.2prevents a target behind the player from connecting even if one of its parts touches the query box.
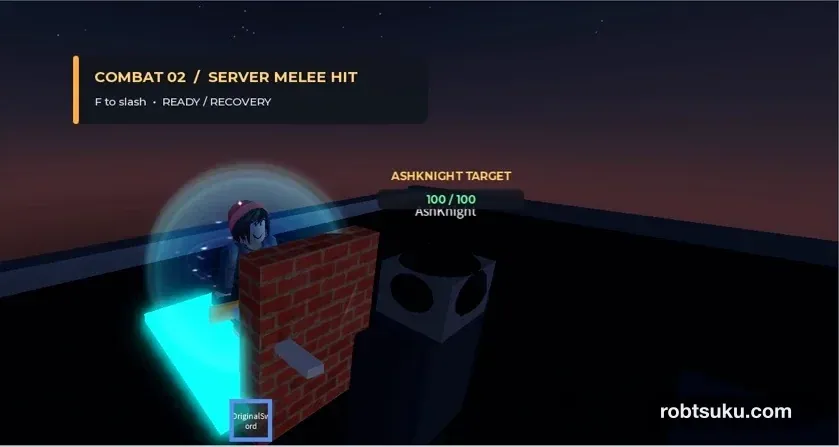
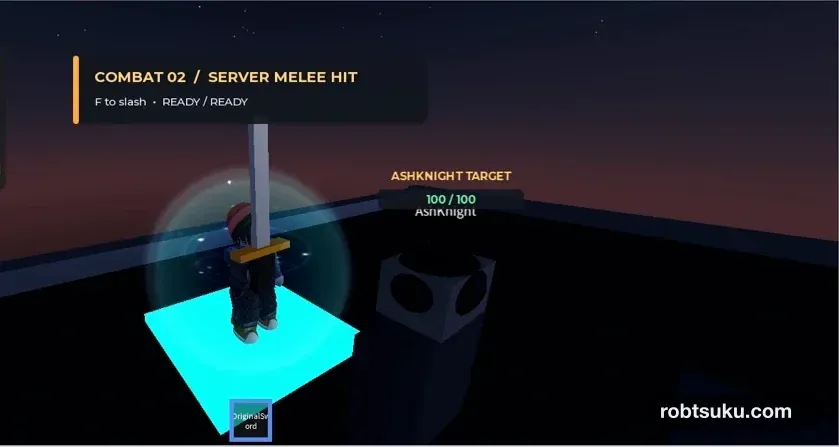
While Play is stopped, set TestWall.Position to 7, 3.5, 10.5. Start Play and attack from directly in front of the dummy; its health should reach 75. Stop again and restore the wall to 0, 3.5, 10.5. Attack from the same position and facing. The overhead display should stay at 100 / 100.
If the blocked attack still deals damage, confirm that TestWall.CanQuery is enabled and that the player, wall, and dummy form the straight line shown in the map. CanQuery controls whether spatial queries such as Raycasts include the Part.
4. Verify 100 HP to 75 HP
Start Play, equip the sword, face the nearby dummy, and attack once.

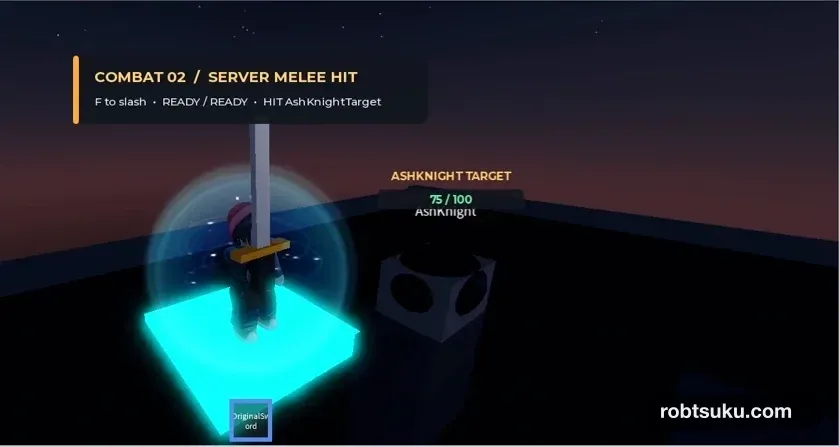
Run these checks one at a time:
- One close, forward-facing attack changes
100to75. - Repeated input during the same swing leaves the value at
75. - A target beyond 8.5 studs takes no damage.
- A target behind the character takes no damage.
- A wall between both roots prevents damage.
Stop and restore the dummy to 100 HP between checks. If one attack removes 50 or more health, make sure hitThisSwing is created inside runAttack() and that only one copy of SwordCombatServer exists.
For a short diagnostic, place print(targetHumanoid.Parent.Name, targetHumanoid.Health) immediately before TakeDamage(). The valid front attack should print one line; distant, rear, and wall cases should print none. Remove the print afterward. If no request begins, confirm that the equipped Tool is under the Character, SwordAttack is directly under ReplicatedStorage, and the server Script is under ServerScriptService. A test wall must keep CanQuery enabled so the Raycast can detect it.
After all five checks, restore the dummy to its front starting position with Health = 100, then return TestWall.Position to 7, 3.5, 10.5. Save the Place with the center lane open. Run one final Play check, confirm that a forward swing stops at 75 HP, and then stop. Runtime damage does not change the saved edit-state health, so project step 3 starts with a 100-HP dummy and the same wall parked to the side.
The server is now the combat authority. Next, you will turn the dummy into AshKnight, detect a living player within 40 studs, and pathfind until the enemy is 6 studs away.