Make a Sword Attack Animation in Roblox Studio
Build an R15 diagonal slash in the Clip Editor and play it from one click—without coding joint angles.
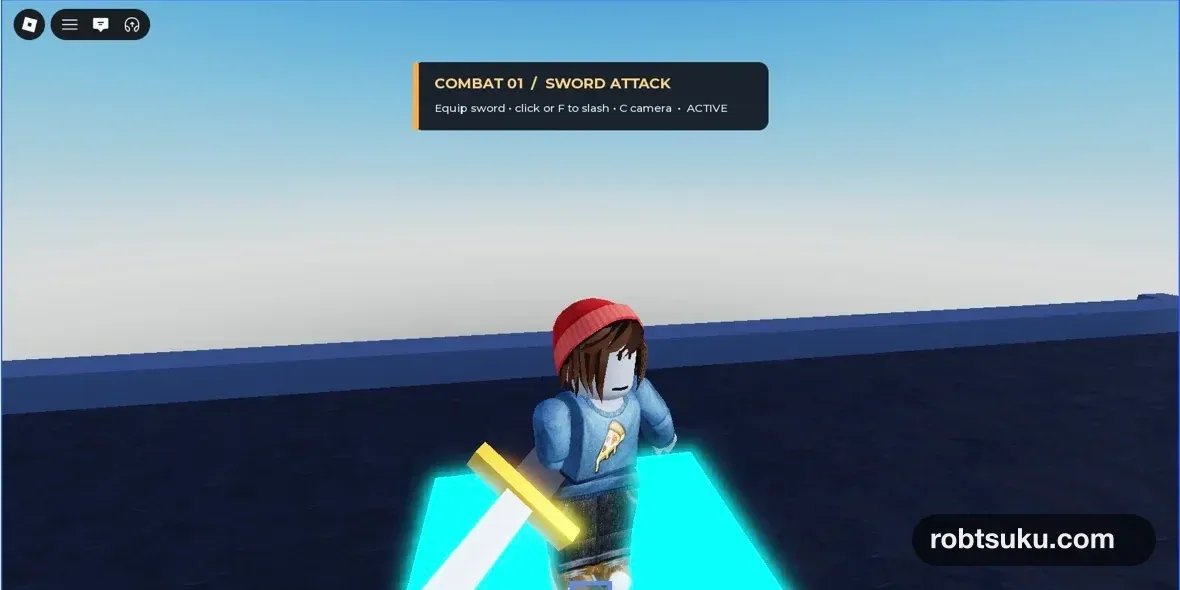
Start with the equipped OriginalSword from the Blender sword guide. In this step, you will pose an R15 avatar directly in Studio and make one click or tap play a complete diagonal slash. You will not write joint angles in code.

This is a visual attack only. The TrainingDummy should not take damage yet.
1. Open the Clip Editor
Stop the playtest. Open Avatar > Character > Generate Rig, add a block-style R15 rig, and rename it SwordAnimationRig in Explorer. Open Avatar > Clip Editor, then select the rig.
The panel at the bottom is the Animation Editor. The current toolbar calls its entry point Clip Editor, while Roblox’s documentation uses Animation Editor for the tool itself.
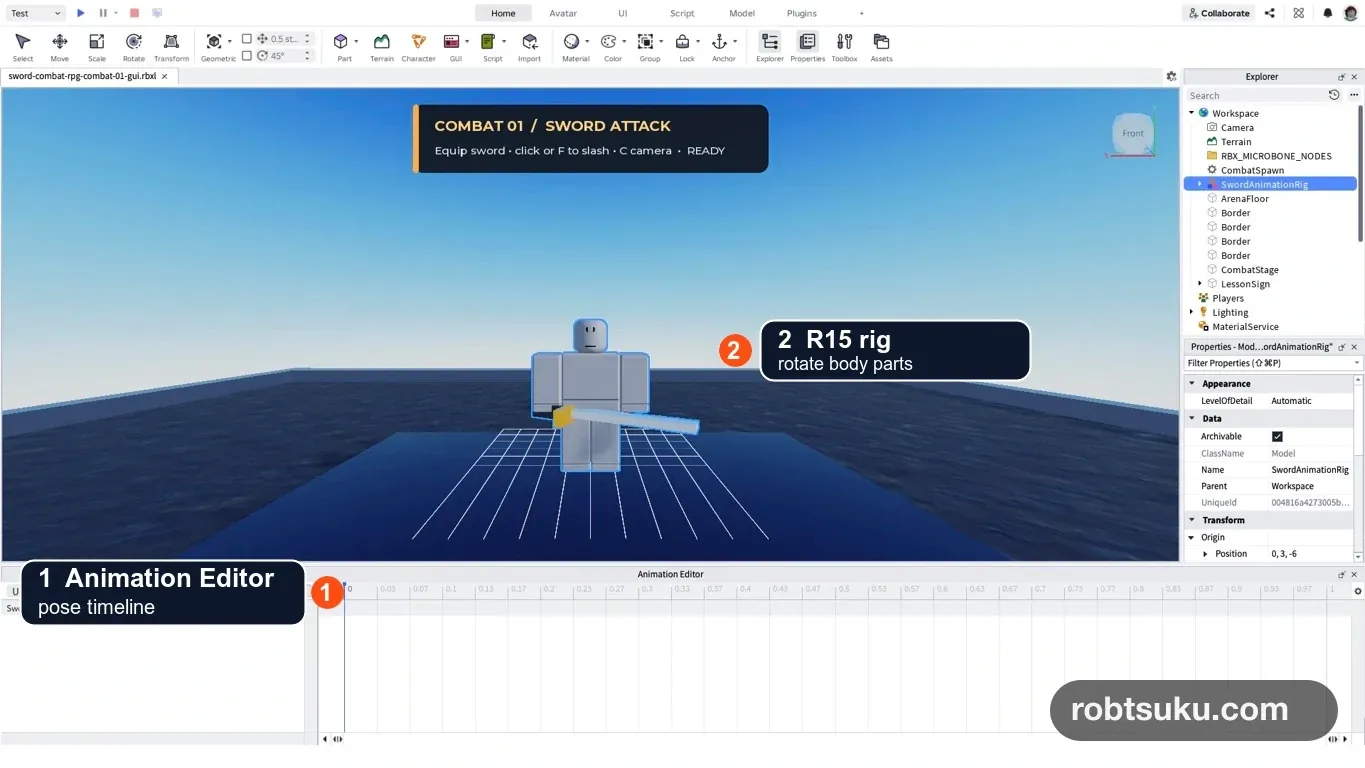
Name the animation SwordSlashPreview and set its length to 0.92 seconds. Move the blue scrubber on the timeline, then use Rotate on the rig. Studio stores the pose at that time as a keyframe. The editor rig can stay bare; the equipped OriginalSword will follow the right hand in Play.
Tip — A keyframe stores a pose at one time
You rotate the rig until it looks right. Studio blends the saved poses between keyframes, so the joint angles do not belong in your script.
2. Make five main poses
Create these five checkpoints first. Use the editor’s Play button or press Space after each one instead of adding fine adjustments immediately.
0.00 READY— hold the right hand in front so the blade reads as a diagonal guard0.22 WINDUP— turn the hips and chest slightly, then pull the right hand above the right side of the head0.34 CUT— move the right hand across the chest toward the lower left while keeping the blade’s length visible0.54 FOLLOW— carry the hand through to the front of the left hip0.92 READY— copy the first pose
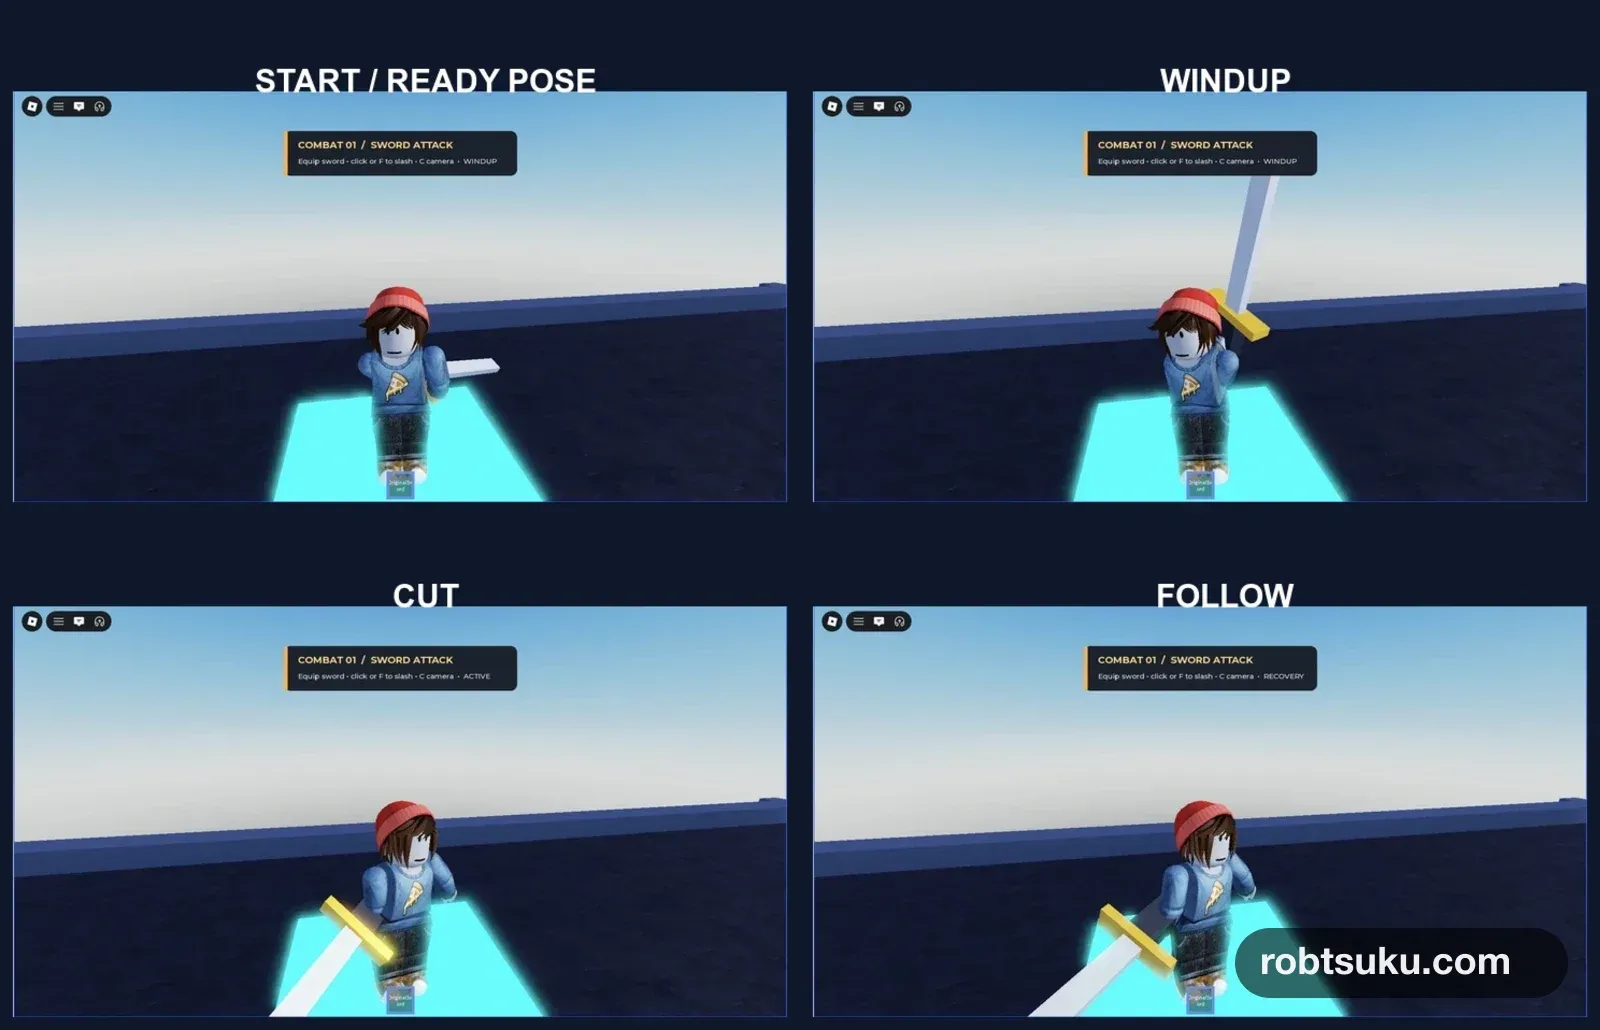
Work from the center outward: LowerTorso > UpperTorso > RightUpperArm > RightLowerArm > RightHand. Let the left arm open slightly in the opposite direction for balance. This produces a body-led cut instead of an arm rotating by itself.
The CUT pose matters most. A blade aimed at the camera looks short and reads like a thrust. Keep the hand in front of the chest, but show the blade diagonally from upper right to lower left. It should pass slightly in front of the avatar, not beside or behind it.
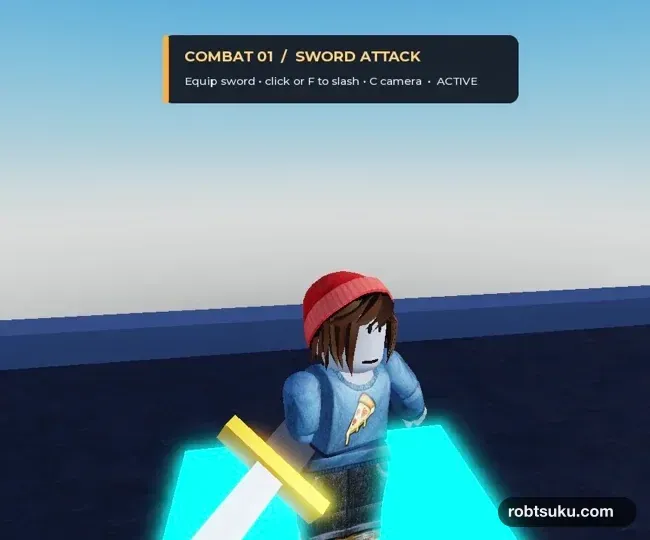
Once those poses connect cleanly, add timing keys at 0.12 / 0.28 / 0.40 / 0.72 seconds. Let the hips lead at 0.12, begin the cut at 0.28, clear the arm toward the lower left at 0.40, and start returning at 0.72. These extra keys stagger the body parts; they do not replace the five readable poses.
Right-click the keys and choose CubicV2. Use In into the cut, Out through the follow-through, and InOut for the return as a starting point. The swing should gather speed just before contact and settle afterward.
3. Add HitStart and HitEnd in the editor
Open the Animation Editor settings and enable Show Animation Events. Move to 0.28, choose Edit Animation Events > Add Event, and add HitStart. Add HitEnd at 0.40. Roblox’s animation events guide uses the same timeline workflow.
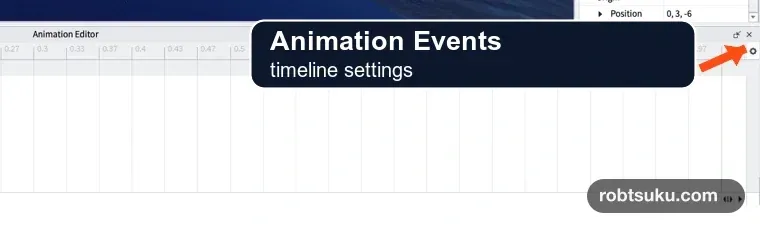
Events do not change the pose. They name the beginning and end of the short interval used by the trail now and server hit detection in the next lesson.

Use … > Set Animation Priority and choose Action. Then use … > Save As and save SwordSlashPreview locally. Studio stores the saved KeyframeSequence under ServerStorage; if it is hard to locate, follow the reference under SwordAnimationRig > AnimSaves. Duplicate the sequence directly into ReplicatedStorage and keep the name SwordSlashPreview so the client can read it during the local test. No asset upload is required.
4. Show a trail only during ACTIVE
Add two Attachment objects under OriginalSword > Handle and name them TrailTop and TrailBottom. For this sword, positions (0, 2.5, 0) and (0, -2.5, 0) span the blade. Add a Trail named SlashTrail, assign the two attachments, leave Enabled off, and set Lifetime to 0.10.
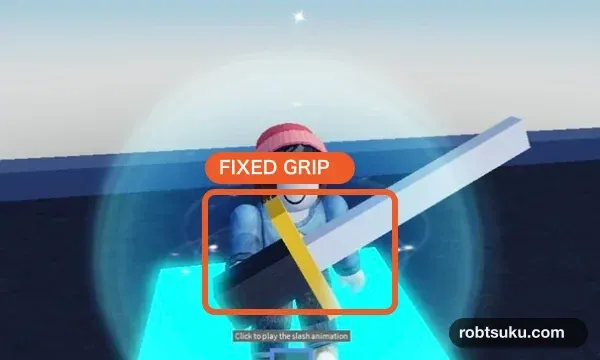
Keep the Tool.Grip value from the prerequisite lesson unchanged throughout the animation. The normal RightGrip connection makes the sword follow the shoulder, elbow, and wrist poses you created in the GUI.
5. Play the saved clip
Add a LocalScript under StarterPack > OriginalSword and name it SwordAnimationClient. This script only reads the GUI-authored clip, plays it, and toggles the trail at the two events. It contains no CFrame.Angles() joint animation.
local AnimationClipProvider = game:GetService("AnimationClipProvider")
local Players = game:GetService("Players")
local ReplicatedStorage = game:GetService("ReplicatedStorage")

local player = Players.LocalPlayer
local tool = script.Parent
local trail = tool.Handle:WaitForChild("SlashTrail")
local sequence = ReplicatedStorage:WaitForChild("SwordSlashPreview")
local track
local busy = false

local function getTrack()
	if track then return track end

	local character = player.Character or player.CharacterAdded:Wait()
	local animator = character.Humanoid:WaitForChild("Animator")
	local animation = Instance.new("Animation")
	animation.AnimationId =
		AnimationClipProvider:RegisterAnimationClip(sequence)

	track = animator:LoadAnimation(animation)
	track.Priority = Enum.AnimationPriority.Action

	track:GetMarkerReachedSignal("HitStart"):Connect(function()
		trail.Enabled = true
	end)
	track:GetMarkerReachedSignal("HitEnd"):Connect(function()
		trail.Enabled = false
	end)
	track.Stopped:Connect(function()
		trail.Enabled = false
		busy = false
	end)

	return track
end

tool.Activated:Connect(function()
	if busy then return end
	busy = true
	getTrack():Play(0.04)
end)

tool.Unequipped:Connect(function()
	if track and track.IsPlaying then
		track:Stop(0.08)
	end
end)
AnimationClipProvider:RegisterAnimationClip() gives the local KeyframeSequence a temporary ID for the current Studio test. The GUI clip still owns every pose and timing decision. A published animation ID can replace this preview path later, but this lesson does not publish anything.
busy ignores extra activations until track.Stopped clears it, keeping the result to one swing per input.
6. Check the slash from the front
Start Play, equip OriginalSword, and click once. Stand still and watch from directly in front first.
Check that:
- the sword pulls overhead
- the right hand enters the space in front of the chest
- the blade stays visibly diagonal as it travels from upper right to lower left
- the follow-through reaches the front of the left hip
- the avatar returns to ready after about 0.92 seconds
Repeated clicks during the swing should not stack motions, and the TrainingDummy should keep its health. If the sword looks like it is stabbing into the face, return to the Animation Editor—not the script—and rotate RightHand at 0.34 until the blade’s length is visible.
Troubleshooting
- If the arm does not move, confirm that both the editor rig and playtest avatar use R15.
- If the timeline is empty, select
SwordAnimationRigand reopen the Clip Editor. - If
SwordSlashPreviewis missing, check its spelling directly underReplicatedStorage. - If an event does not fire, restore the exact names
HitStartandHitEndwithout spaces. - If the blade escapes beside the avatar, move the CUT and FOLLOW hand poses in front of the chest and left hip.
- If the blade points at the camera, rotate the wrist at 0.34 until the diagonal blade length is visible.
You now have one GUI-authored slash from one input. The next step will let the server query the space in front of the player between HitStart and HitEnd and deal exactly 25 damage.